Transferring Data
- chrisreidy@arizona.edu
- sarawillis@arizona.edu
- ric@arizona.edu
THIS SITE IS DEPRECATED
We have transitioned to another service and are no longer actively updating this site.
Refer to our new documentation at: hpcdocs.hpc.arizona.edu
Overview
- The bastion host provides secure access to the HPC supercomputers, has limited storage capacity and is not intended for file transfers.
- To make transfers to/from HPC, you will need to have logged into your account at least once. If you have not, you may encounter "directory does not exist" errors. This is because your home directory is not created until you log in for the first time. See here about System Access
![]()
Files are transferred to shared data storage and not to the bastion node, login nodes, or compute nodes. Because the storage is shared, your files are accessible on all clusters; Puma, Ocelote and Elgato. When you look at the diagram above, you can intuitively see the efficiency of transferring data without additional hops. Keeping mind that the data pipes are wider also, allowing for faster data transmission.
Data Transfers by Size
- Small Transfers: For small data transfers the web portal offers the most intuitive method.
- Transfers <100GB: we recommend sftp, scp or rsync using filexfer.hpc.arizona.edu.
- Transfers (>100GB), transfers outside the university, and large transfers within HPC: we recommend using Globus (GridFTP).
Transfer Software Summary
| Software | CLI Interface? | GUI Interface? | Cloud Services | Notes | |||
|---|---|---|---|---|---|---|---|
| Google Drive | Amazon Web Services | Box | Dropbox | ||||
| Globus | |||||||
| SFTP | |||||||
| SCP | On Windows, WinSCP is available as a GUI interface. | ||||||
| rsync | Grsync is a GUI interface for rsync for multiple platforms. | ||||||
| rclone | rclone has recently announced they have an experimental GUI. | ||||||
| Cyberduck | |||||||
| iRODS | |||||||
File transfers and SSH Keys
Several of the file transfer methods listed below use authentication based on the SSH protocol, including scp, sftp and rsync. Therefore, adding your SSH Key to the filexfer.hpc.arizona.edu node can allow one to avoid entering passwords when using those methods. See the documentation for adding SSH Keys.
Transfer Applications and Protocol
GridFTP / Globus
NEW: for comprehensive information on using Globus, see: Globus
Overview
GridFTP is an extension of the standard File transfer Protocol (FTP) for high-speed, reliable, and secure data transfer. Because GridFTP provides a more reliable and high performance file transfer (compared to protocols such as SCP or rsync), it enables the transmission of very large files. GridFTP also addresses the problem of incompatibility between storage and access systems. You can read more about the advantages of GridFTP here.
To use GridFTP, we recommend you use Globus. Globus uses endpoints to make transfers.
Endpoints
HPC Endpoint
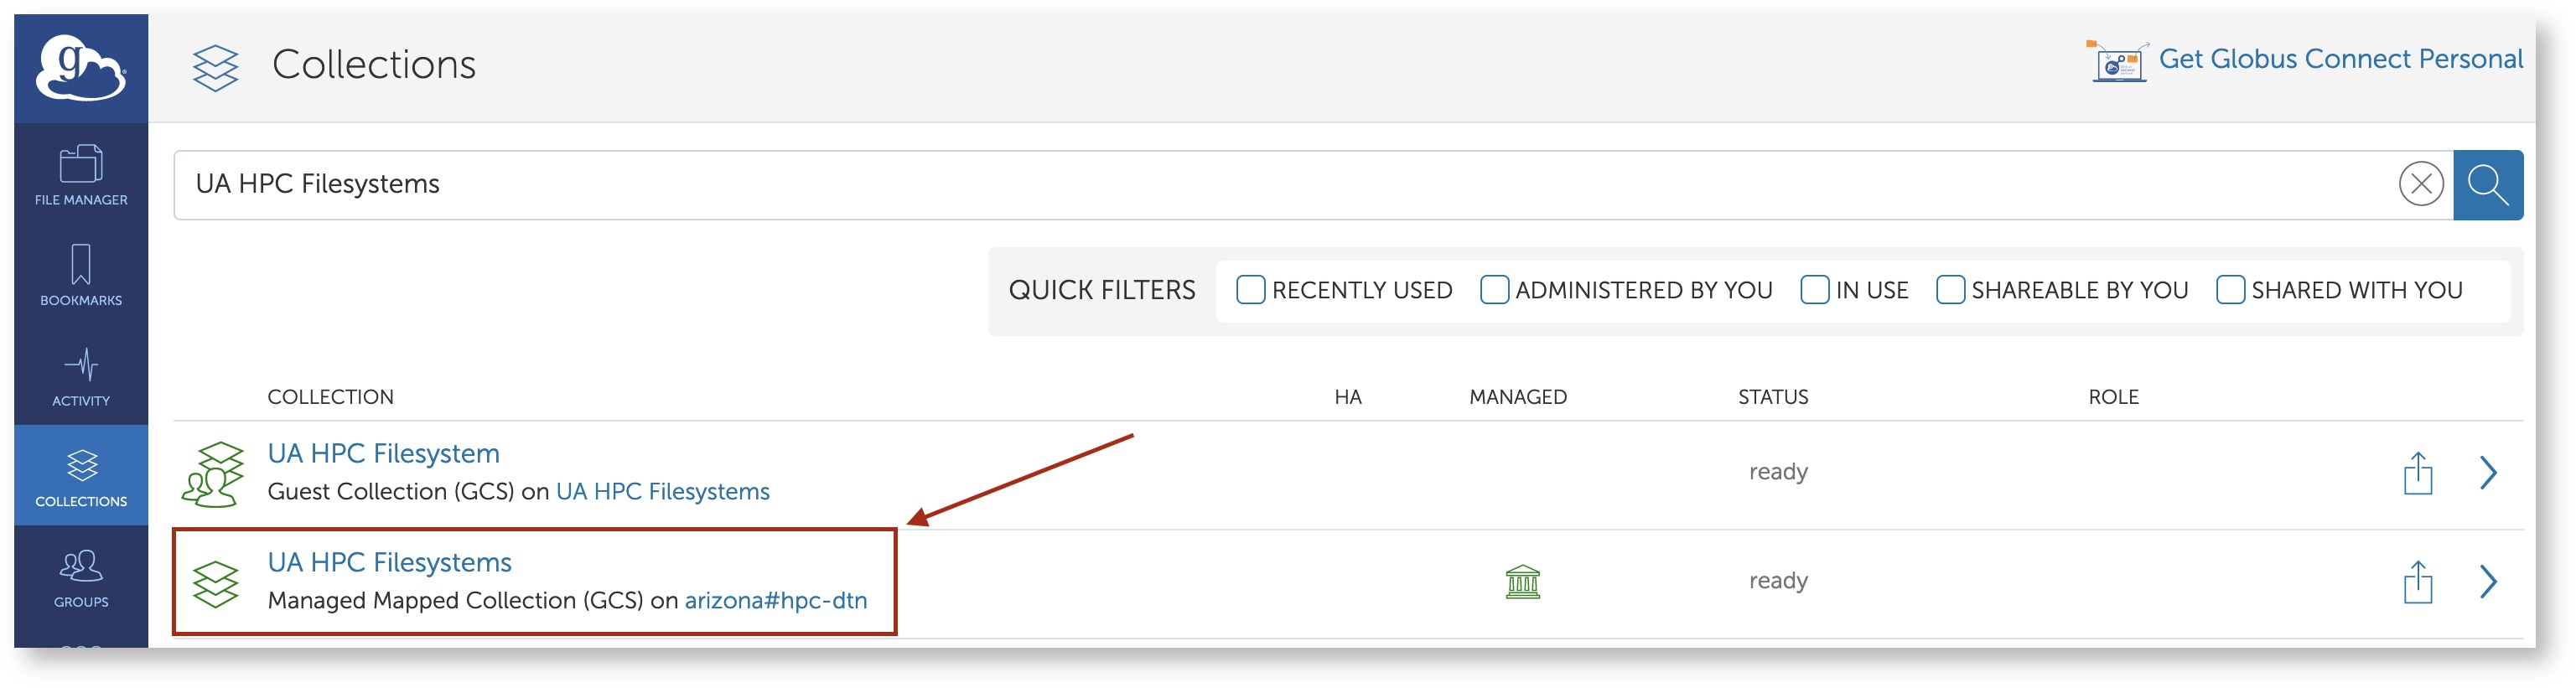
The endpoint for HPC can be found by searching UA HPC Filesystems under the Collections tab. If you do not see the UA HPC Filesystems collections, uncheck any checked filter in Quick Filters. Select the result UA HPC Filesystems with the subheading Managed Mapped Collection.
Storage Rental Endpoint
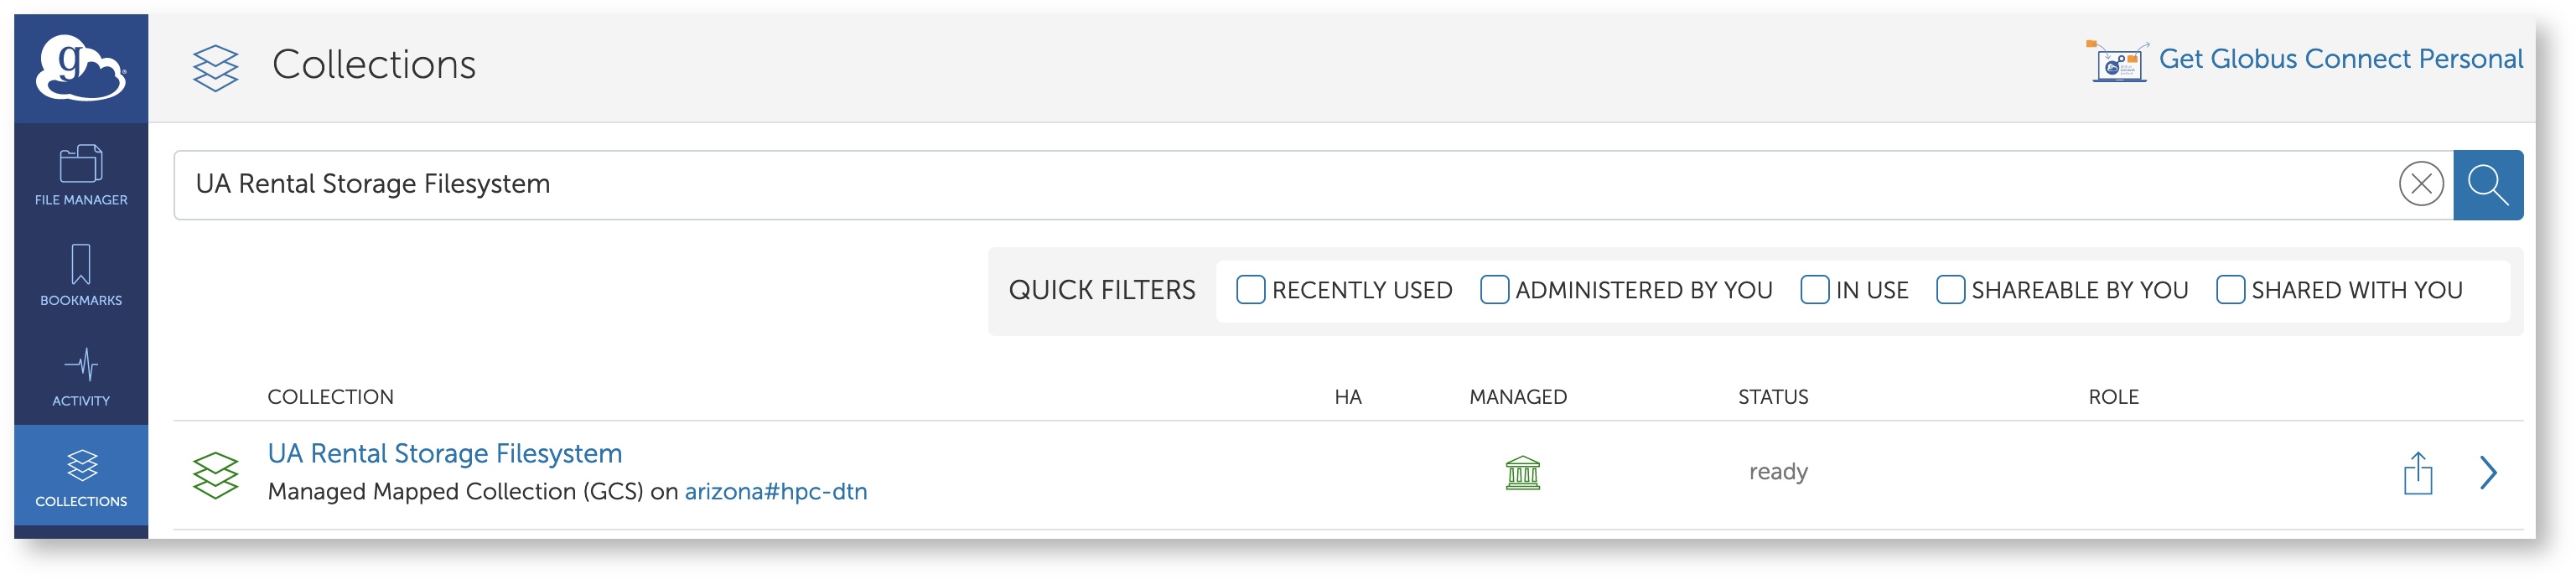
The endpoint for rental storage (found on the filexfer nodes under /rental) can be found by searching UA Rental Storage Filesystem under the Collections tab.
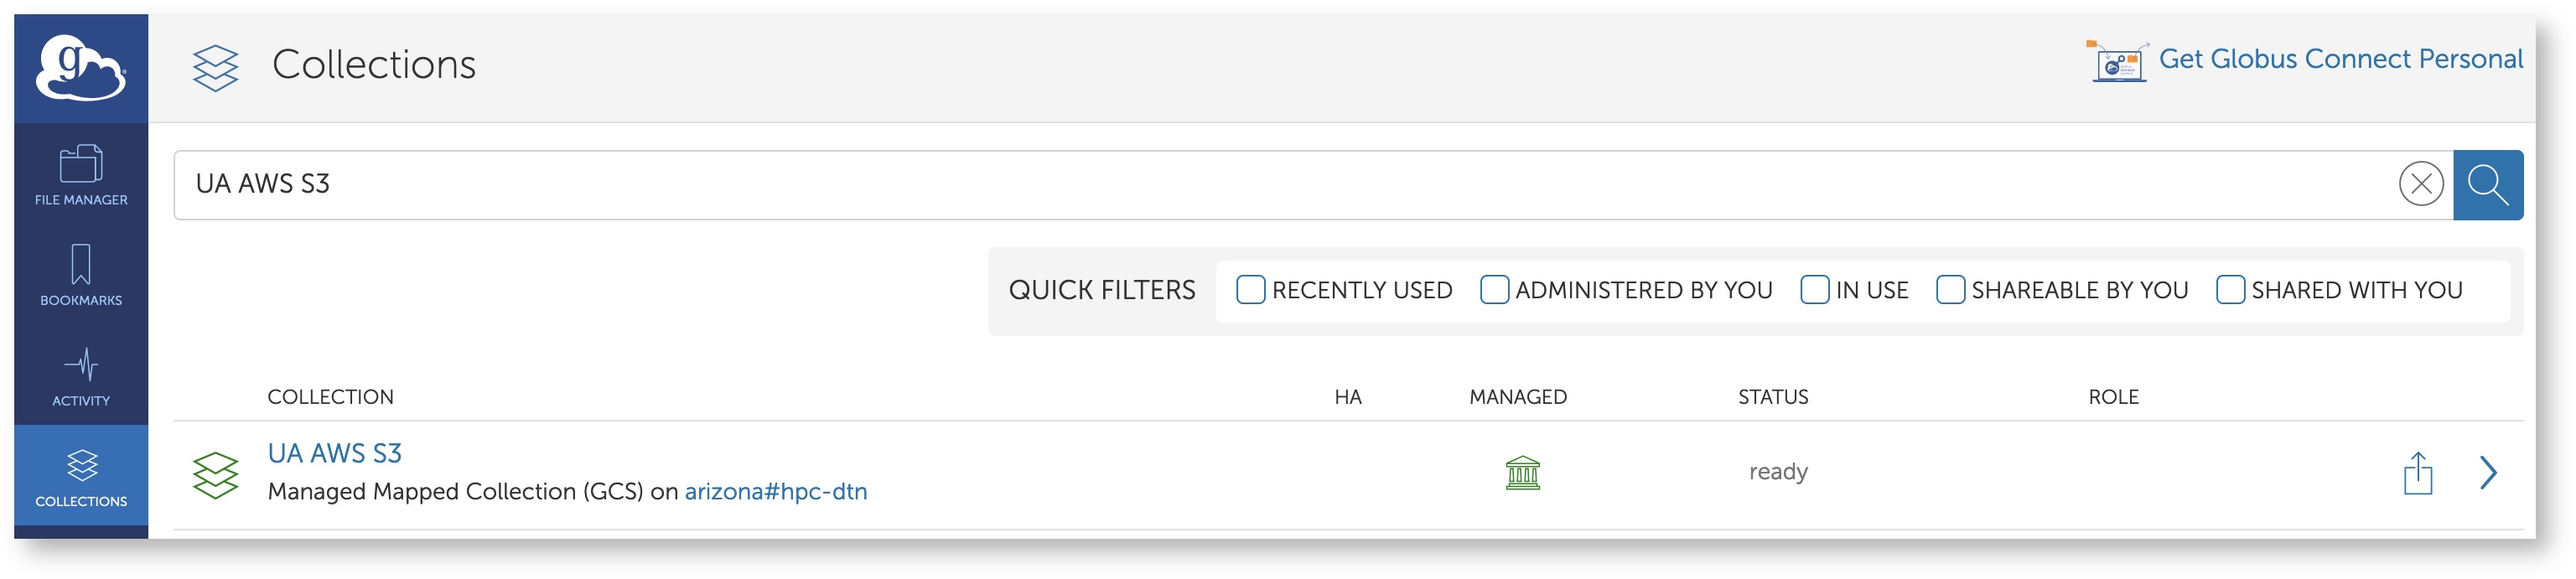
AWS S3 Endpoint (UITS Subsidized Tier 2 Storage)
- Under the Collections tab, enter UA AWS S3 in the search bar. In the results, you should see the name UA AWS S3 show up with the description Managed Mapped Collection. Click the endpoint's name to proceed.
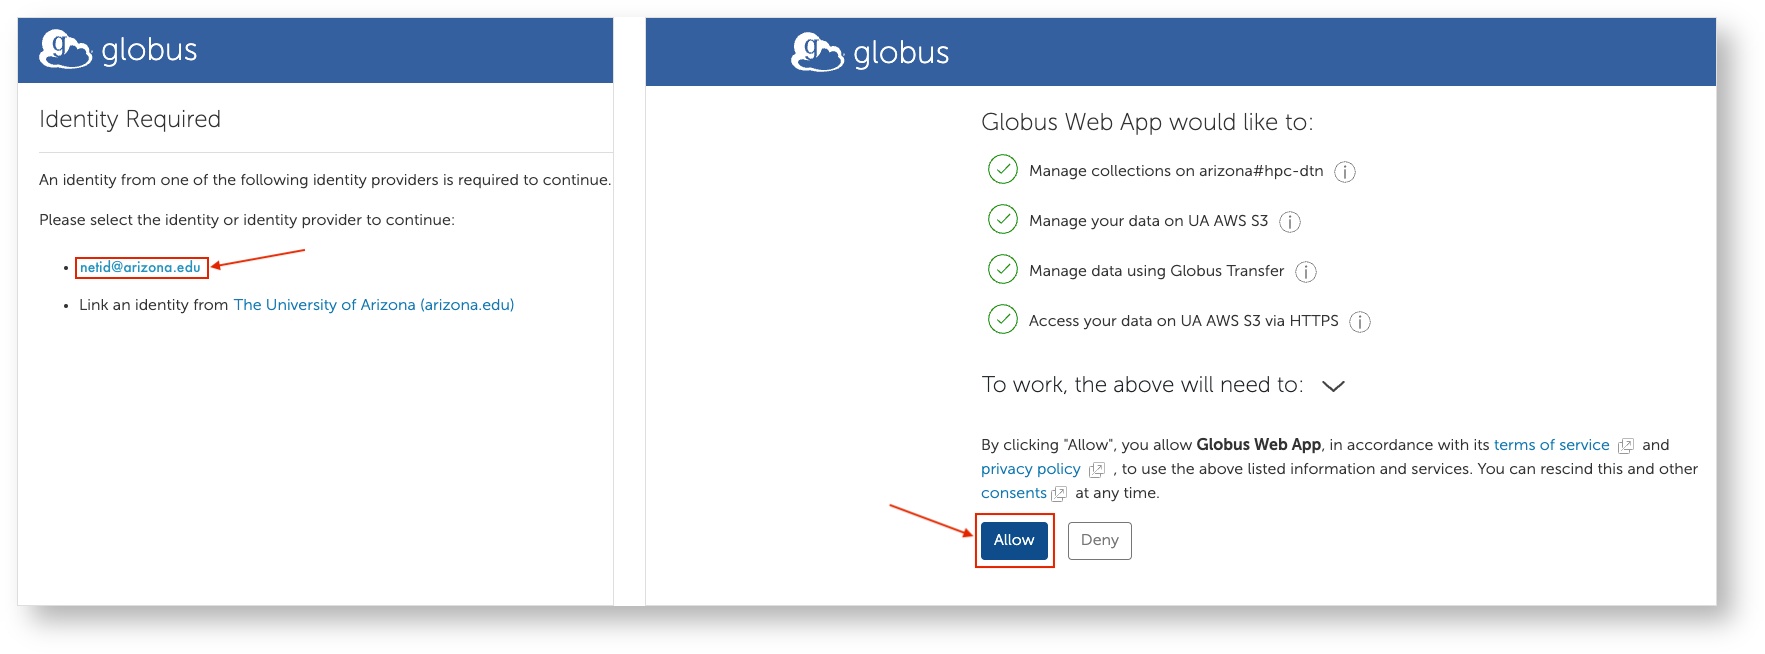
- Next, select the Credentials tab. If you are prompted for Authentication/Consent, click Continue
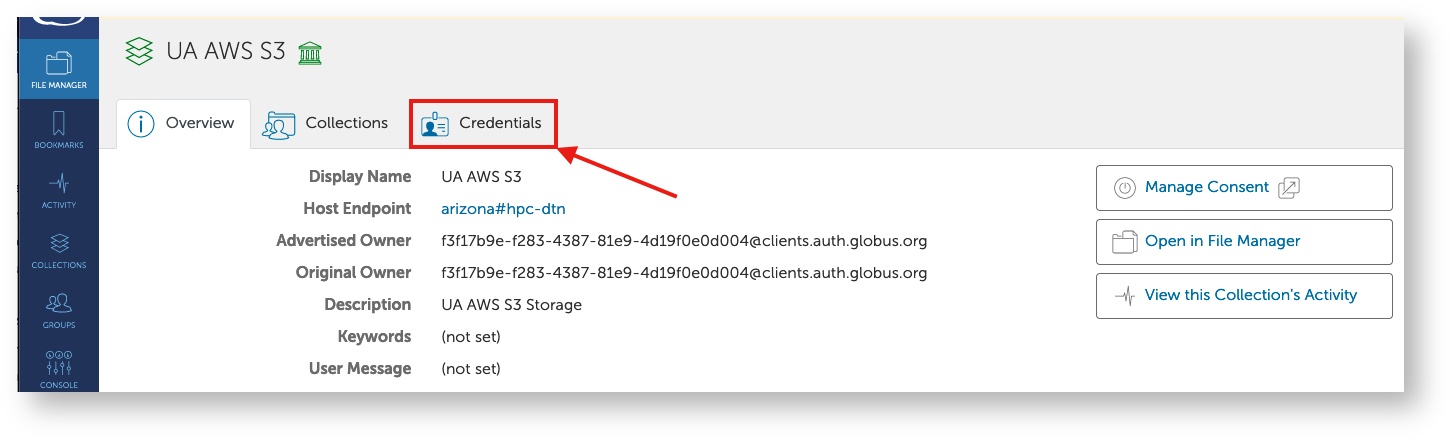
- If requested, authenticate by selecting your Arizona email address, then Allow.
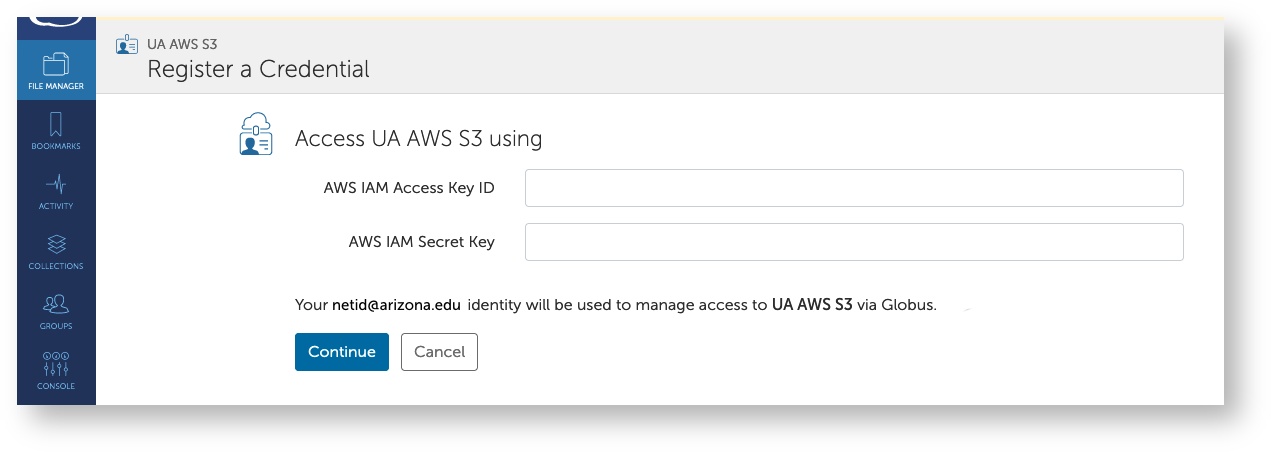
- You will then be returned to the Credentials tab. From there, link to your AWS S3 Bucket by entering your public and private keys in the provided fields
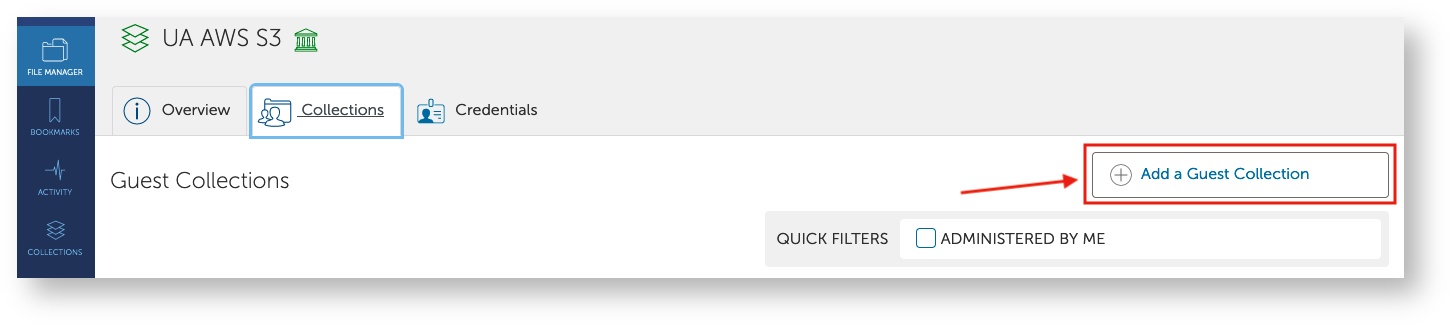
- Once you've added your keys, navigate back to the UA AWS S3 collection, go to the Collections tab, and click Add a Guest Collection on the right
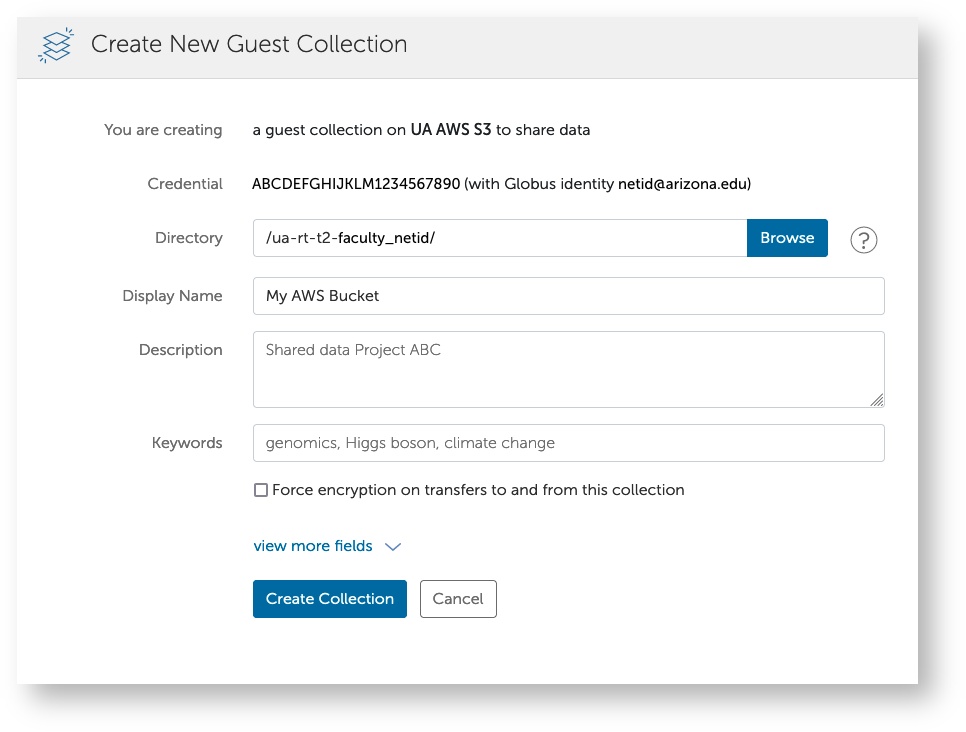
Under Create New Guest Collection, click Browse next to the Directory field to find your group's AWS bucket. You will find it under /ua-rt-t2-faculty_netid/ where faculty_netid is the NetID of the faculty member who requested the bucket. Under Display Name, enter a descriptive name that you can use to identify your bucket. Once you've completed the process, click Create Collection.
If you encounter Authentication/Consent Required after clicking Browse, click Continue, select your university credentials, and click Allow. That should bring you back to the Browse window.
- To find and use your new collection, navigate to the Collections tab, go to Shareable By You, and select the name. That will open your collection in the File Manager window allowing you to view the contents and initiate transfers.

SFTP
The intent is that filexfer.hpc.arizona.edu is to be used for most file transfers. SFTP encrypts data before it is sent across the network. Additional capabilities include resuming interrupted transfers, directory listings, and remote file removal. To transfer files with SFTP, you will need to open an SSH v2 compliant terminal and navigate to a desired working directory on your local machine. To access HPC
$ sftp NetID@filexfer.hpc.arizona.edu
You will then be able to move files between your machine and HPC using get and put commands. For example:
sftp> get /path/to/remote/file /path/to/local/directory ### Retrieves file from HPC. Omitting paths will default to working directories.
sftp> put /path/to/local/file /path/to/remote/directory ### Uploads a file from your local computer to HPC. Omitting paths will default to working directories.
sftp> help ### prints detailed sftp usage
FTP/LFTP
Due to security risks, it is not possible to FTP to the file transfer node from a remote machine, however, you may FTP from the file transfer node to a remote machine.
HPC uses the FTP client LFTP to transfer files between the file transfer node and remote machines. This can be done using get and put commands. To use lftp, you must first connect to our file transfer node using an SSH v2 compliant terminal:
$ ssh NetID@filexfer.hpc.arizona.edu
Once connected, you may connect to the external host using the command lftp. For example:
$ lftp ftp.hostname.gov
You will then be able to move files between HPC and the remote host using get and put commands. For example:
> get /path/to/remote/file /path/to/local/directory ### retrieves file from remote host
> put /path/to/local/file /path/to/remote/directory ### Uploads file from HPC to remote host
For more information on LFTP, see their official documentation.
SCP
SCP uses Secure Shell (SSH) for data transfer and utilizes the same mechanisms for authentication, thereby ensuring the authenticity and confidentiality of the data in transit.
Windows
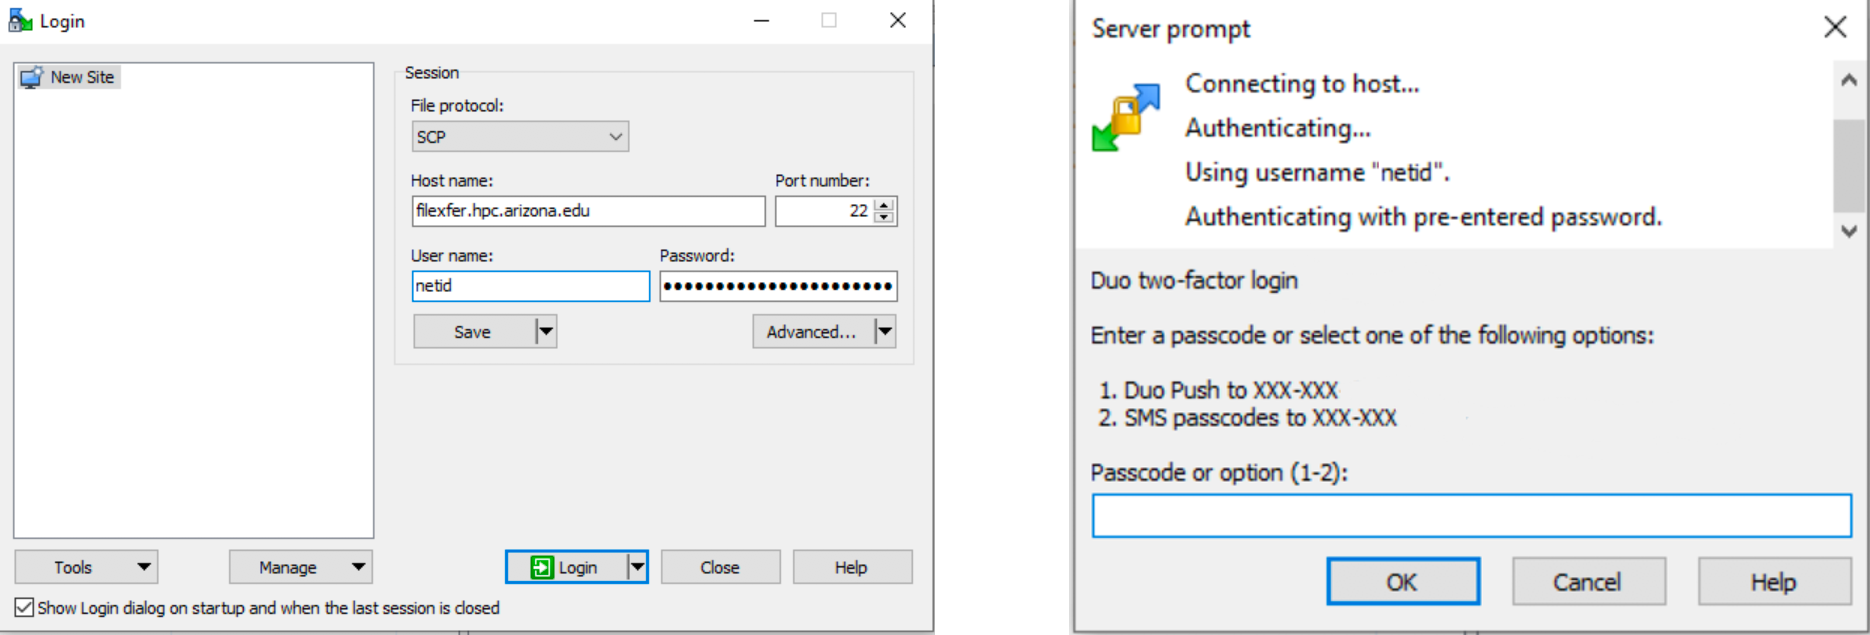
Windows users can use software like WinSCP to make SCP transfers. To use WinSCP, first download/install the software from: https://winscp.net/eng/download.php
To connect, enter filexfer.hpc.arizona.edu in the Host Name field, enter your NetID under User name, and enter your password. Accept by clicking Login. You'll be prompted to Duo Authenticate:
rsync
rsync is a fast and extraordinarily versatile file copying tool. It synchronizes files and directories between two different locations (or servers). Rsync copies only the differences of files that have actually changed. An important feature of rsync not found in most similar programs/protocols is that the mirroring takes place with only one transmission in each direction. Rsync can copy or display directory contents and copy files, optionally using compression and recursion. You use rsync in the same way you use scp. You must specify a source and a destination, one of which may be remote.
Example 1:
Recursively transfers all files from the directory src/directory-name on the machine computer-name into the /data/tmp/directory-name directory on the local machine. The files are transferred in archive mode, which ensures that symbolic links, devices, attributes, permissions, ownerships, etc. are preserved in the transfer. Additionally, compression will be used to reduce the size of data portions of the transfer.
$ rsync -avz computer-name:src/directory-name user@remote.host:/data/tmp --log-file=hpc-user-rsync.log
Example 2:
rsync -avz computer-name:src/directory-name/ user@remote.host:/data/tmp --log-file=hpc-user-rsync.log
A trailing slash on the source changes this behavior to avoid creating an additional directory level at the destination. You can think of a trailing / on a source as meaning “copy the contents of this directory” as opposed to “copy the directory by name”, but in both cases the attributes of the containing directory are transferred to the containing directory on the destination.
Additional Options:
| Flag | Meaning |
|---|---|
| -a | Archive mode; will preserve timestamps |
| -v | Increase verbosity |
| -z | Compress file data during the transfer |
| --log-file | Log everything done in specified FILE |
iRODS
The Research Computing test iRODS instance has been dismantled. iRODs servers are available elsewhere (like CyVerse).
There are two ways to iRODS - either by command line or using a GUI like Cyberduck on your workstation.
 Graphical Interface with Cyberduck
The patch applied in Cyberduck 8.4.4 has caused issues with two-factor authentication which is required to access filexfer.hpc.arizona.edu.
Cyberduck is an open source cross-platform, high-throughput and parallel data transfer transfer program that supports multiple transfer protocols (FTP, SFTP, WebDAV, Cloud files, Amazon S3, etc.). It serves as an alternative to the iDrop Java applet, and has been extensively tested with large data transfers (60-70 GB). This allows users to transfer large files, depending on the user's available bandwidth and network settings.
Cyberduck versions are available for Mac OS (10.6 and higher on Intel 64-bit) and Windows (Windows XP, Windows Vista, Windows 7, or Windows 8). LINUX users should use iDrop Desktop or iCommands. Cyberduck version 4.7.1 (released July 7, 2015) and later supports the iRODS protocol.
To use Cyberduck with iRODS:
- Install or Update Cyberduck. If Cyberduck has already been installed, you may update it under the dropdown Cyberduck → Check for Updates. If you need to install Cyberduck for the first time, go to https://cyberduck.io/, download the installer that is appropriate for your operating system and install. See Cyberduck Preferences for more information on installation.
- Configure Cyberduck for use with iRODS:
- Open Cyberduck and click Open Connection
- In the first drop down field, enter a profile name
- Create the connection entering your iRODS server under Server, 1247 under Port, and your username under Username.
- Transfer Files by opening another connection and dragging/dropping files.
rclone
Rclone is a CLI installed on filexfer.hpc.arizona.edu that can be used to transfer files to Google Drive as well as other Cloud-based storage sites. To use rclone, you will need to start by configuring it. The walkthrough provided by rclone is fairly straightforward.
Configuration
Cyberduck
Cyberduck is a graphical file transfer application that can be used to connect to and transfer files between your local computer and various remote servers and cloud storage services. To get started, you can download the application onto your local workstation from their website here: https://cyberduck.io/
Initiating Transfers
Once you have Cyberduck installed, open the software and select New Browser from the toolbar

In the window that opens, select Open Connection

This will give you a number of options to choose from.
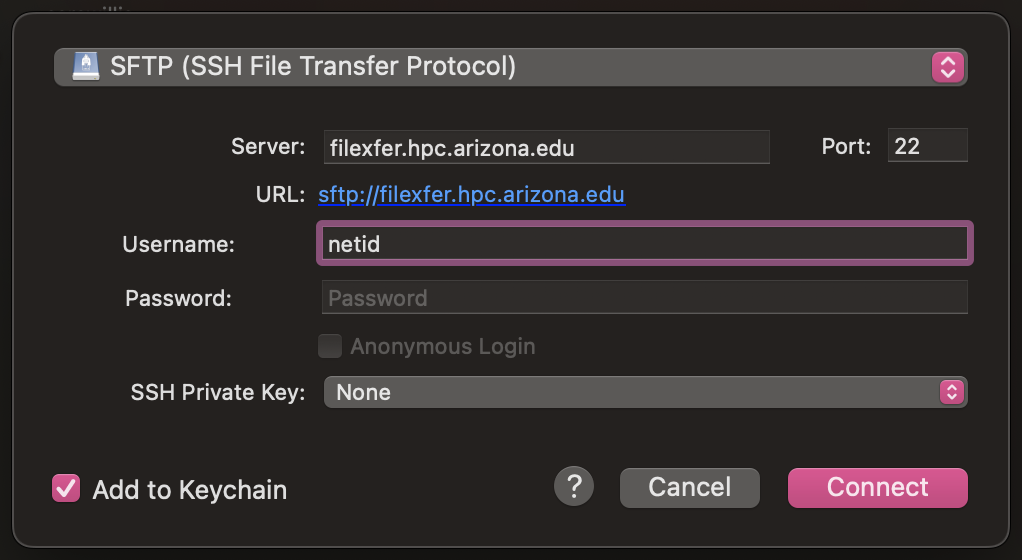
To connect to HPC, select the SFTP (SSH File Transfer Protocol) from the top dropdown, enter filexfer.hpc.arizona.edu under Server, and your university credentials under Username and Password.
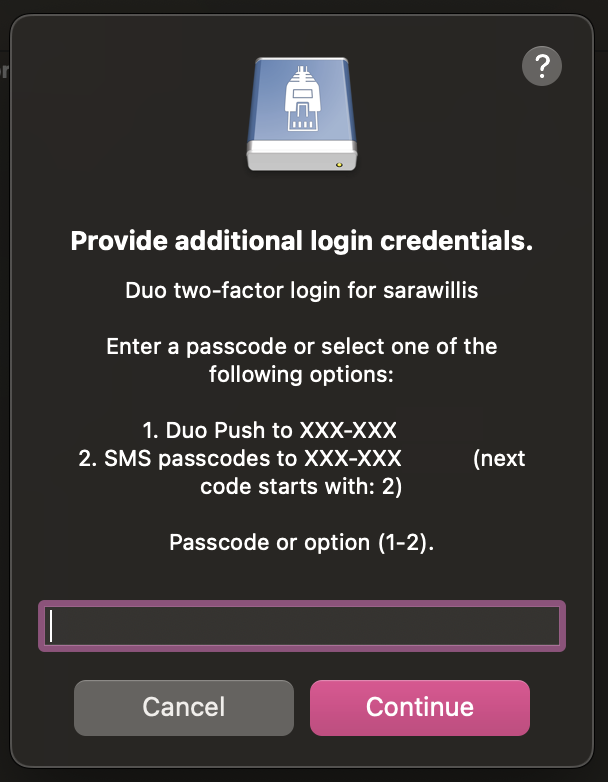
Once you click Connect, you will be prompted to duo-authenticate
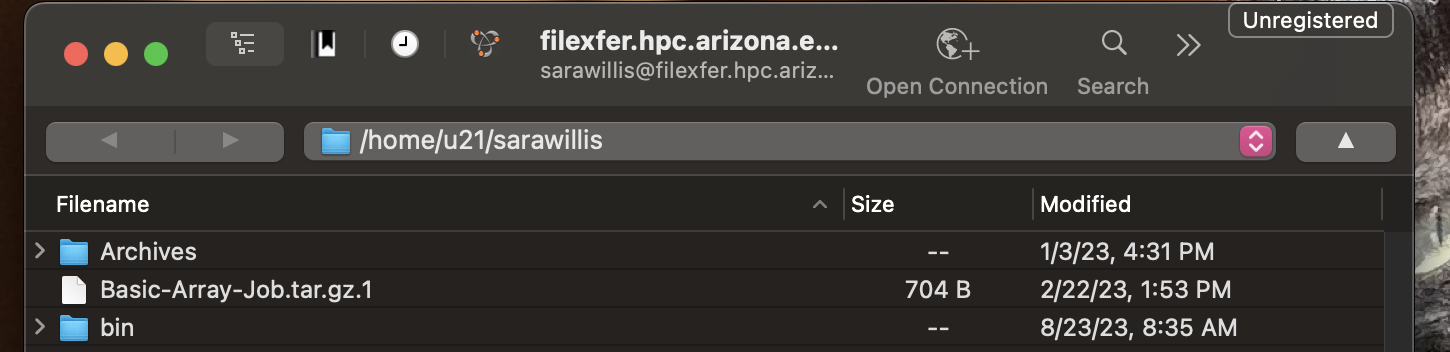
If your connection is successful, you will see a window open with the contents of your home directory.
To connect to Google Drive, select the Google Drive option from the dropdown tab and select Connect
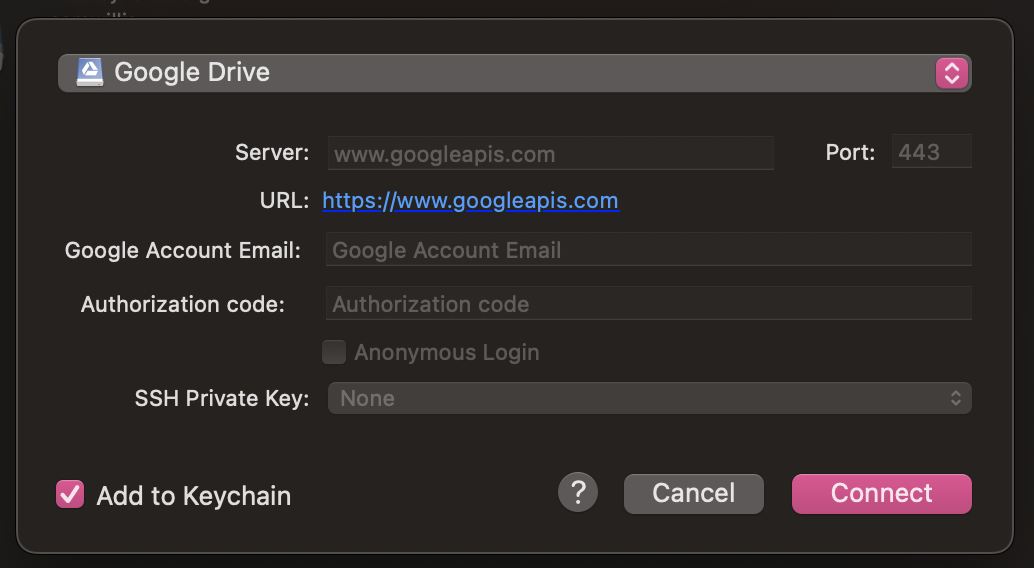
This will open a browser where you will be prompted to log into your Google Drive account.
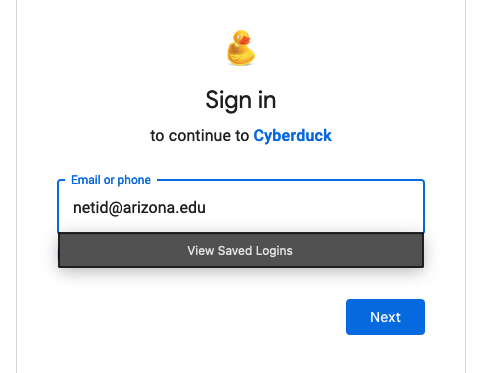
Once you have successfully logged in, grant access to Cyberduck where prompted. If this process is successful, you should see a connection window where you can navigate through the contents of your Google Drive.
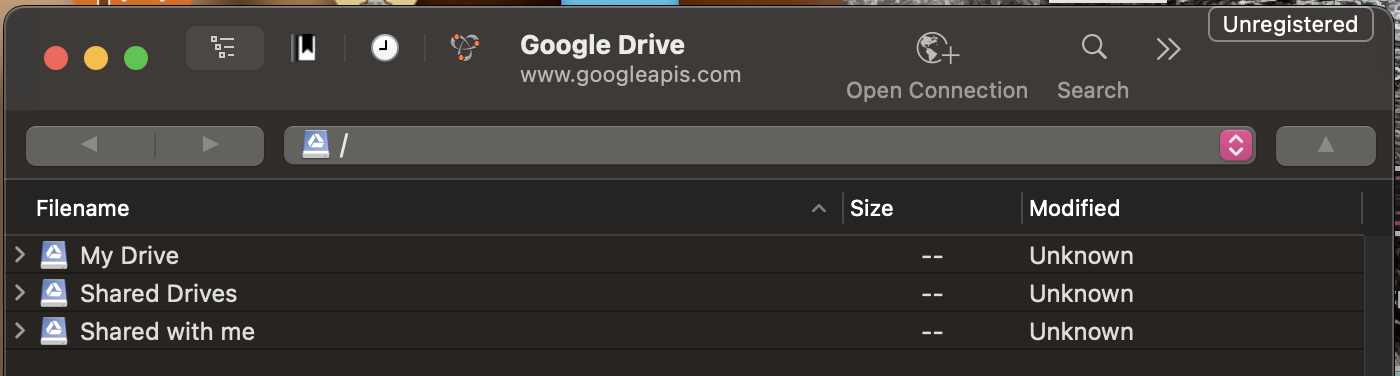
To initiate transfers, simply drag and drop your files between the Cyberduck window and your local computer. If you have multiple connections open, you can also initiate transfers between two remotes by dragging and dropping files between two connection windows.
Github
To get a folder synced to a personal Github repository on HPC, you’ll need to generate a linked SSH key. Fortunately, Github has good documentation to walk you through this. Some minor modifications need to be made to the instructions and will be listed:
Generate an SSH Key: https://help.github.com/en/articles/generating-a-new-ssh-key-and-adding-it-to-the-ssh-agent
Modifications: If you encounter instructions telling you to usessh-add -K ~/.ssh/id_rsa, the-Koption is not recognized on HPC so this step will not work. Run the following command instead$ ssh-add ~/.ssh/id_rsa
Add SSH Key to Github: https://help.github.com/en/github/authenticating-to-github/adding-a-new-ssh-key-to-your-github-account
Modifications: The command $pbcopy < ~/.ssh/id_rsa.pubwill not work. Use:$ cat ~/.ssh/id_rsa.pub
then copy the output with your cursor and paste it into your Github account as directed.
- Clone Your Repository: https://help.github.com/en/github/creating-cloning-and-archiving-repositories/cloning-a-repository
Once you have a repository on your account, you can work with it using the usual git commands.