Research Desktop Attached Storage
THIS SITE IS DEPRECATED
We have transitioned to another service and are no longer actively updating this site.
Refer to our new documentation at: hpcdocs.hpc.arizona.edu
Requesting an Allocation
You can request an allocation on R-DAS from https://portal.hpc.arizona.edu/portal:
- Go to the Storage tab.
- Select Create Shared Desktop Storage under Research Desktop Storage.
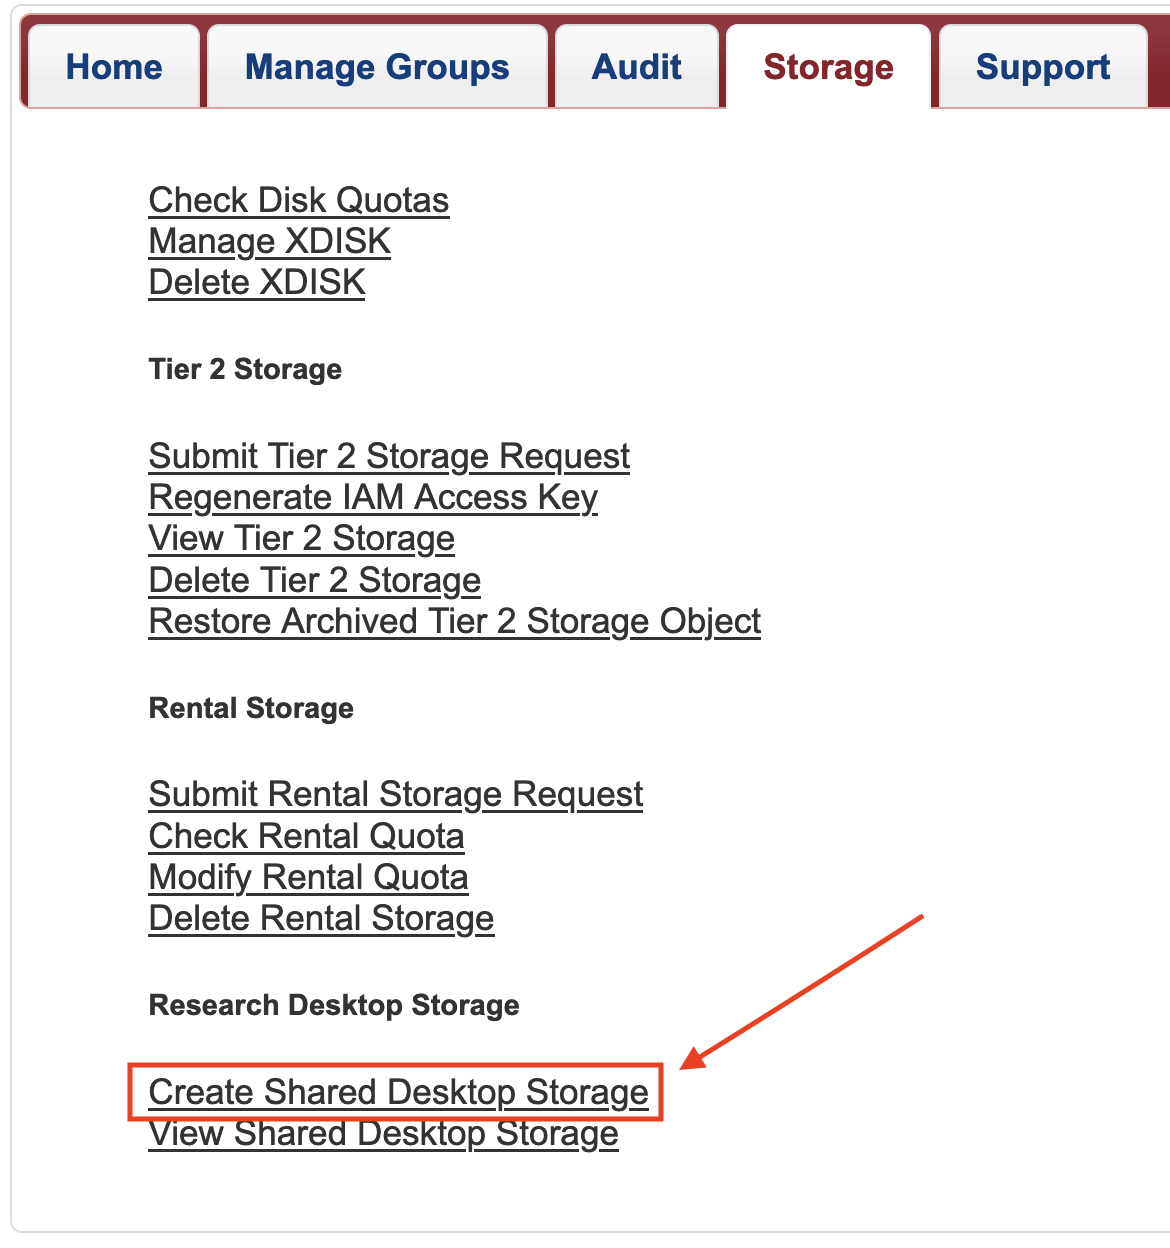
- Select Create from the window that opens.
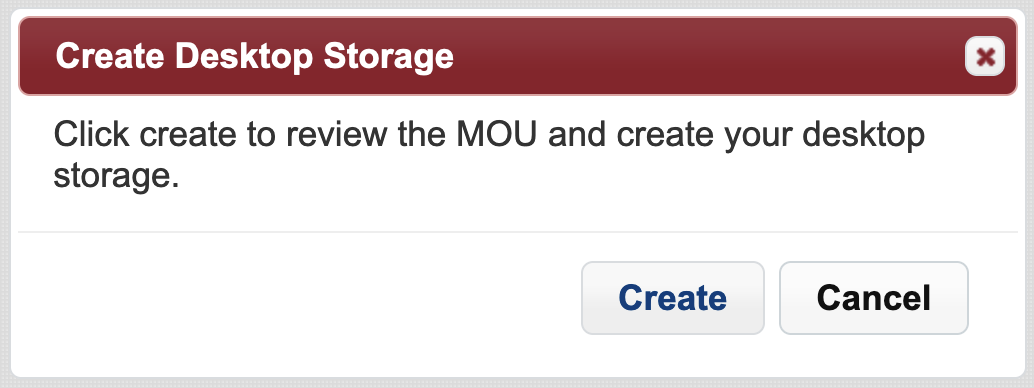
- A window opens with the MOU. Review it and, if it is acceptable to you, select Agree.

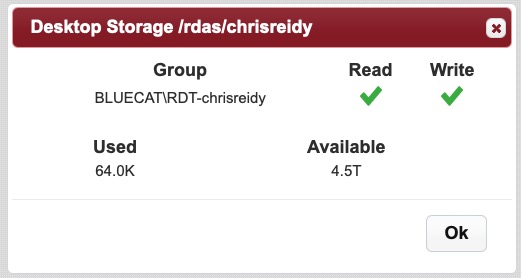
- You can now View Shared Desktop Storage
Accessing Your R-DAS Allocation
UA IP Address Required: To access your R-DAS allocation you need to be connected to either the UA campus network, or the UA SSL VPN. For information about connecting to a VPN, see VPN - Virtual Private Network. If you are accessing your R-DAS allocation from an HPC cluster, then you are already on the UA campus network and do not need to connect to the UA SSL VPN.
R-DAS can be accessed from Linux, MacOS, or Windows. The screenshots are intended to be visual aids, but they include information from the consulting team. When you proceed, please enter your own information.
Installing Necessary Packages
Please do not run any sudo commands on the HPC clusters. These are meant only for your personal Linux machines. All required packages are already installed on the HPC clusters.
To access your R-DAS allocation from a Linux distribution, you need the samba package. If you are using a GTK based desktop environment, such as MATE and GNOME, then you will also need the Samba backend for GVfs. If you want to access your R-DAS allocation from the command line, you will need the smbclient package. Select your Linux distribution from the list below to view installation instructions:
The smbclient package is not available on the HPC. Please use the GUI method to access your R-DAS allocation from the HPC clusters.
For other Linux distributions, please check their respective documentation to learn how you can install these packages.
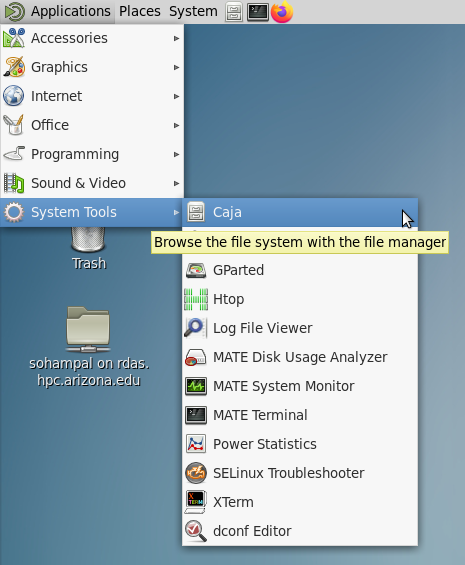
On a desktop environment, such as MATE, GNOME, KDE, you can mount your R-DAS allocation as a local drive with the corresponding file manager (Caja on MATE, GNOME Files, Dolphin on KDE).
On a desktop environment you can mount the R-DAS allocation with the following (the screenshots are from Caja on MATE, but the experience is similar across the other deskop environments):
Open the file manager (Caja, GNOME Files, Dolphin).
On the HPC Interactive Desktop's MATE desktop environment, you can launch Caja by clicking the file drawer like icon in the top bar, or by selecting Applications > System Tools > Caja.
- Press
Ctrl + l. This makes the location bar editable. - Enter smb://rdas.hpc.arizona.edu in the location bar, and press
Enter.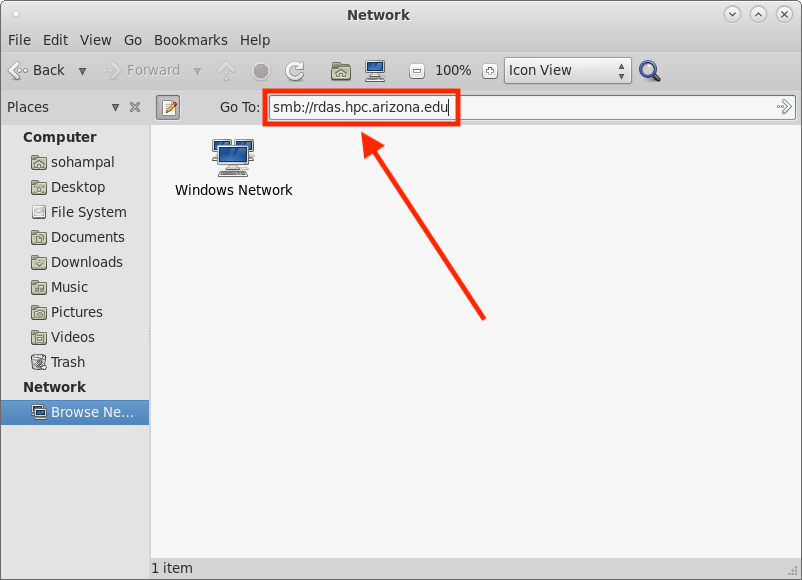
A few moments later a window opens, prompting for your Username (
BLUECAT\followed by your UA NetID) and Password (UA NetID password). After entering the details, select Connect (on other file managers this maybe OK). Some file managers, such as Caja and GNOME Files, also have a Domain field, whereas others, like Dolphin, do not. Either way, you do not need to modify its default value.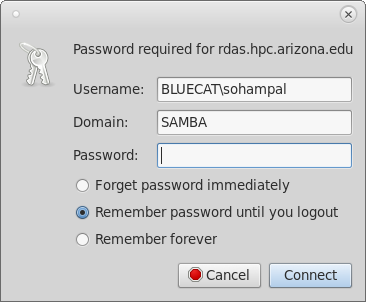
- Select the allocation named after your group from the list of allocations displayed.

- On some file managers, such as Dolphin, you can right away access your allocation by double clicking on it. On others, such as Caja and GNOME Files, double clicking on it will open another window prompting for your Username (
BLUECAT\followed by your UA NetID) and Password (UA NetID password). Select Connect as user, enter the details, and select Connect. Your allocation will be mounted as a local drive.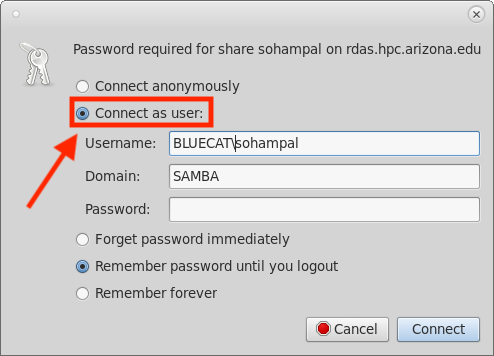
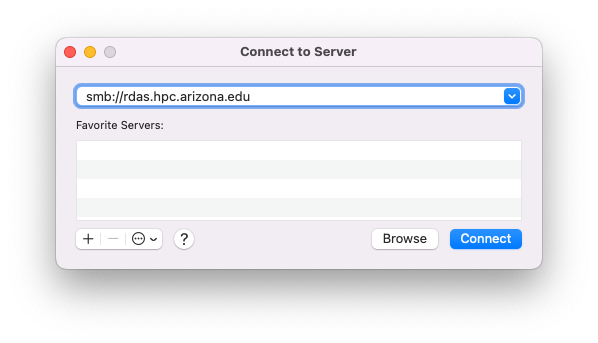
If you are on a Mac, then you can mount your R-DAS allocation as a local drive with the following steps:
- Go to Finder.
- Select Go from the top menu bar.
- From the drop-down menu, select Connect to Server.
- In the window that opens, enter smb://rdas.hpc.arizona.edu in the address bar, and select Connect.
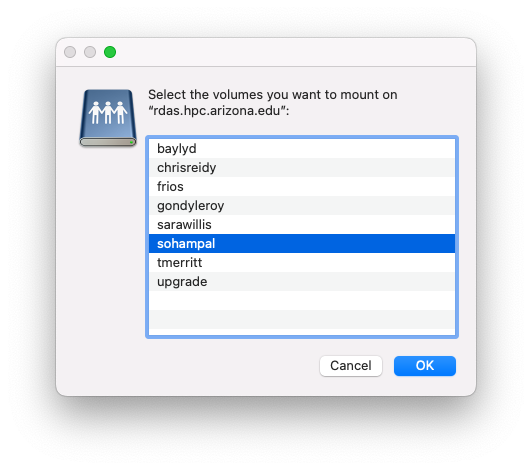
- After a few moments a window opens prompting for your Name (UA NetID) and Password (UA NetID password). After entering the details, select Connect.

- A window opens with the list of allocations on the array. Select allocation named after your group, and then select OK.
If you are on Windows, you can mount your R-DAS allocation as a local drive with the following steps:
- Open Windows Explorer.
- Enter \\rdas.hpc.arizona.edu in the location bar, and press
Enter.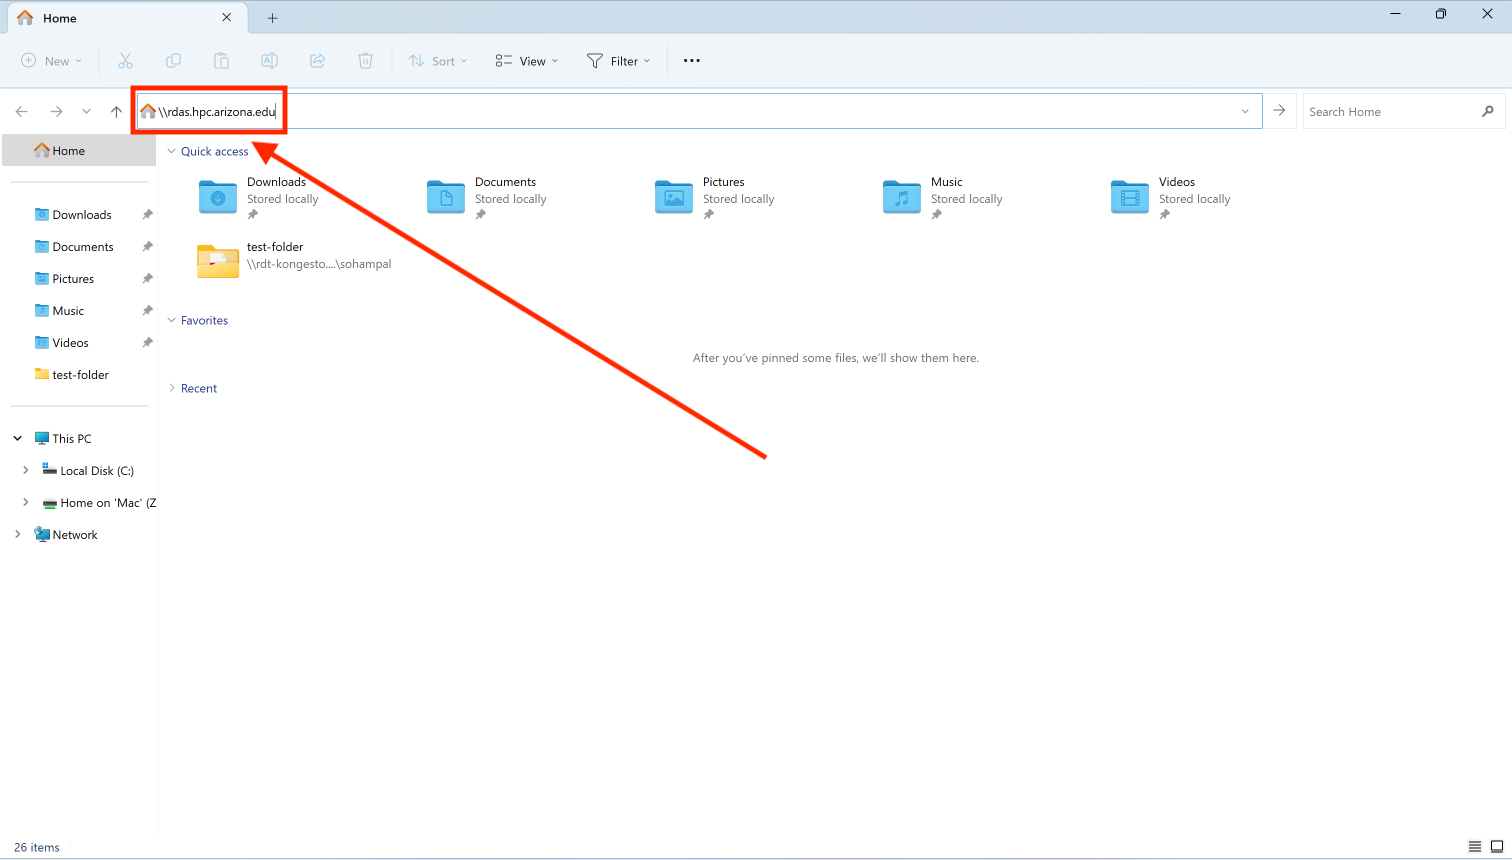
- A few moments later a window opens, prompting for your Username (
BLUECAT\followed by your UA NetID) and Password (UA NetID password). After entering the details, select OK.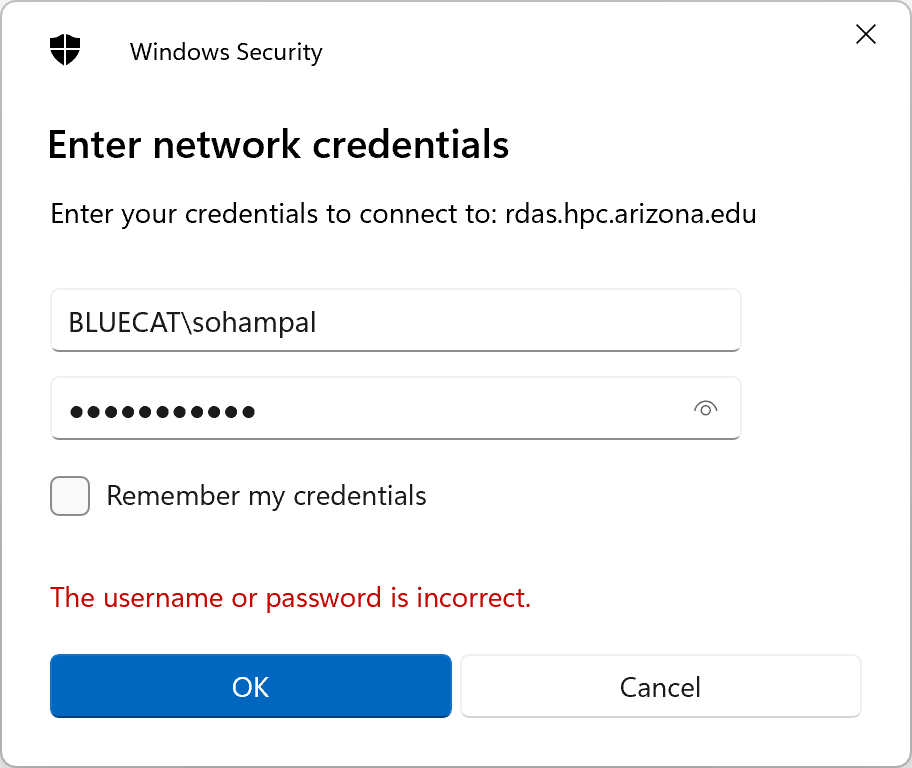
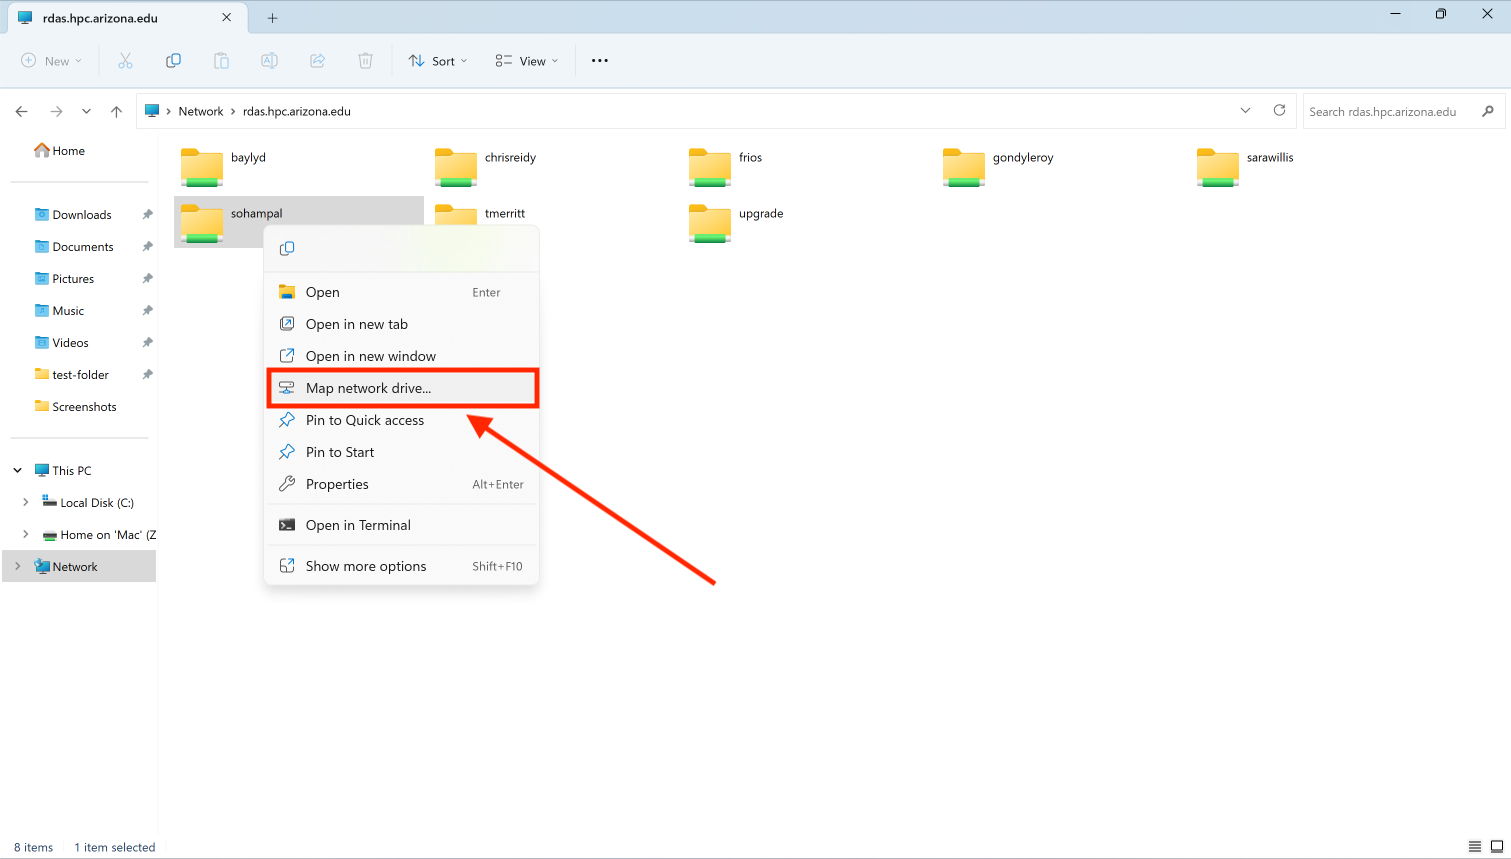
- Select the allocation named after your group from the list of allocations displayed. You can directly open the allocation by double-clicking on it, or mount it by right clicking on it and selecting Map network drive.
FAQ
For R-DAS questions follow this link.