Containers


New HPC Documentation Website!

New documentation is coming that will replace our current Confluence website (the one you're viewing right now). We will be sending an announcement on when the site will go live. Interested in taking a peek? Check out this page for the beta version. Note: the URL is likely to change.


New GPUs on Ocelote!

We have recently added 22 new P100 GPUs to Ocelote. Need to request multiple GPUs on a node and you're finding Puma queue times too slow? You can now request two GPUs per node on Ocelote using --gres=gpu:2.

Singularity/Apptainer update

During the October 26, 2022 maintenance window, Singularity was removed and replaced with Apptainer. The commands singularity (now a link pointing to Apptainer) and apptainer may be used to perform all the same operations you're used to and you can still run your existing images. However, remote builds via SyLabs are no longer supported. Instead, in many cases you may build your image directly on a compute node using:

$ singularity build local_image.sif container.recipe

Containers Overview

A container is a packaged unit of software that contains code and all its dependencies including, but not limited to: system tools, libraries, settings, and data. This makes applications and pipelines portable and reproducible, allowing for a consistent environment that can run on multiple platforms.

Shipping containers have frequently been used as an analogy because the container is standard, does not care what is put inside, and will be carried on any ship; or in the case of computing containers, it can run on many different systems.

Docker is widely used by researchers, however, Docker images require root privileges which means they cannot be run in an HPC environment.

Apptainer (formerly Singularity) addresses this by completely containing the authority so that all privileges needed at runtime stay inside the container. This makes it ideal for the shared environment of a supercomputer. Even better, a Docker image can be encapsulated inside an Apptainer image. Some ideal use cases that can be supported by Apptainer on HPC include:

  • You already use Docker and want to run your jobs on HPC.
  • You want to preserve your environment so a system change will not affect your work.
  • You need newer or different libraries than are offered on the system.
  • Someone else developed a workflow using a different version of Linux.
  • You prefer to use a Linux distribution other than CentOS (e.g. Ubuntu).
  • You want a container with a database server like MariaDB.

The documentation here provides instructions on how to either take a Docker image and run it from Apptainer, or create an image using Apptainer only.

Contents


Accessing Apptainer on HPC

Apptainer is installed on the operating systems of all HPC compute nodes, so can be easily accessed either from an interactive session or batch script without worrying about software modules. 


Building a Container

With the introduction of Apptainer during the October 26, 2022 maintenance cycle, remote builds on SyLabs are no longer supported. Instead, in most cases it should be possible to build your images directly on a compute node using:

$ apptainer build local_image.sif container.recipe

This has been tested for recipes bootstrapping off of Docker images. We have found that in some cases (e.g. Boostrap: yum images) a local build will fail due to permissions issues. If you experience this and need assistance, contact our consultants and they can help come up with some alternatives.


Apptainer, Nvidia, and GPUs


One of the most significant use cases for Apptainer is to support machine learning workflows. For information on using GPUs on HPC, see our GPU documentation.

Pulling Nvidia Images

The NVIDIA GPU Cloud (NGC) provides GPU-accelerated HPC and deep learning containers for scientific computing.  NVIDIA tests HPC container compatibility with the Singularity runtime through a rigorous QA process. Application-specific information may vary so it is recommended that you follow the container-specific documentation before running with Singularity. If the container documentation does not include Singularity information, then the container has not yet been tested under Singularity. Apptainer can be used to pull, execute, and bootstrap off of Singularity images.

 Pulling Images Instructions

Pulling Images Instructions


  • The containers from Nvidia that are in /contrib have been modified to include path bindings to /xdisk and /groups. They also include the path to the Nvidia commands like nvidia-smi.
  • Because login nodes are small and do not provide software, singularity images should be pulled and executed on a compute node.

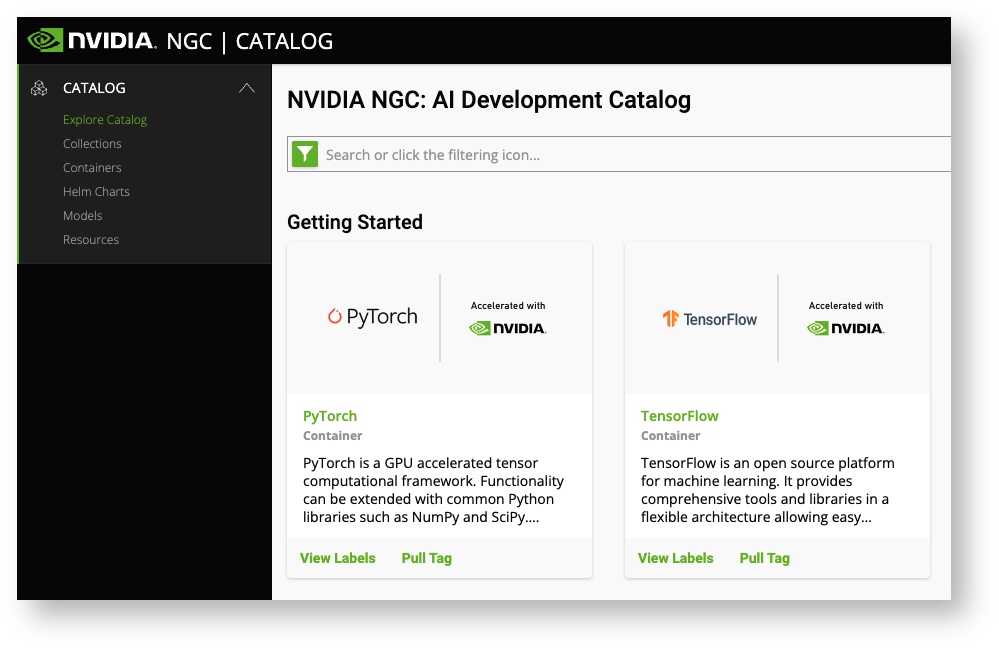
To start, you'll need to register with NvidiaOnce you have an account, you can view their images from their catalogue. Click on the name of the software you're interested in to view available versions

If you click on the Tags tab at the top of the screen, you'll find the different versions that are available for download. For example, if we click on TensorFlow, we can get the pull statement for the latest tag of TensorFlow 2 by clicking the ellipses and selecting Pull Tag.

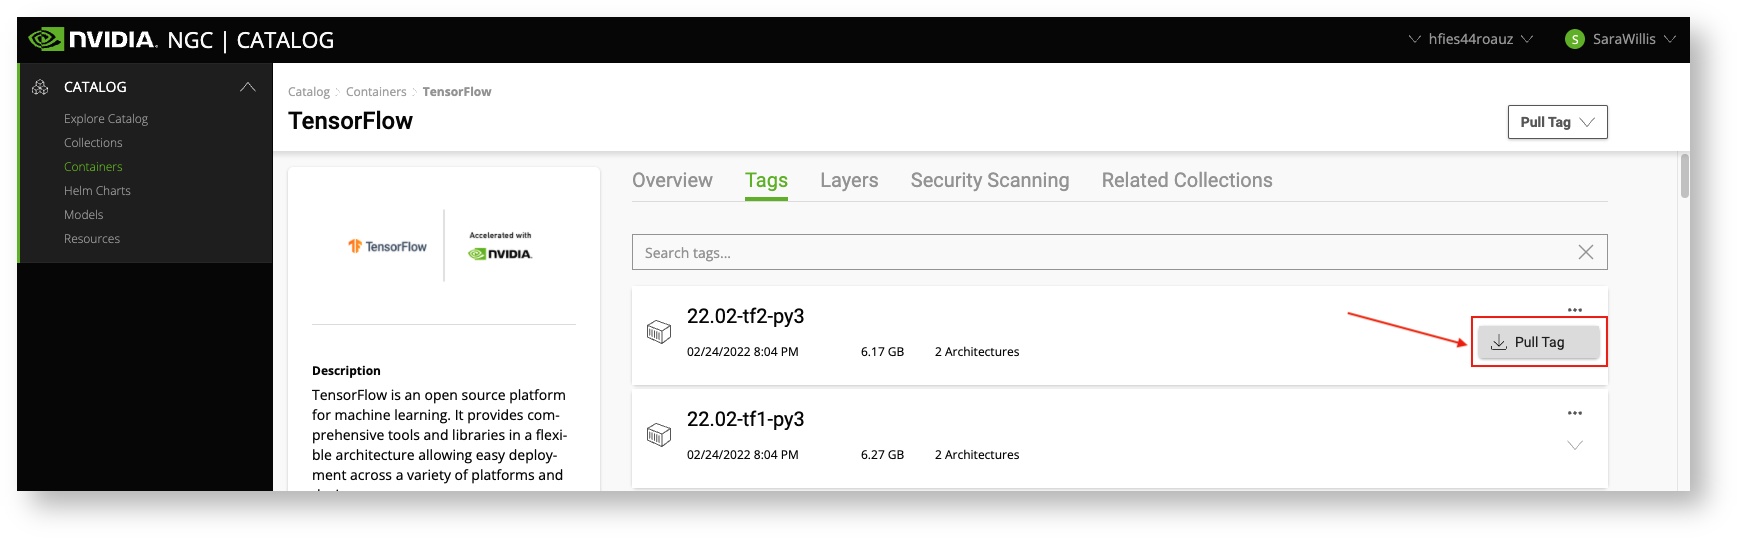
This will copy a docker pull statement to your clipboard, in this case:

$ docker pull nvcr.io/nvidia/tensorflow:22.02-tf2-py3

To pull and convert this NGC image to a local Apptainer image file, we'll convert this to:

$ apptainer build ~/tensorflow2-22.02-py3.sif docker://nvcr.io/nvidia/tensorflow:22.02-tf2-py3

The general format for any pull you want to do is:

$ apptainer build <local_image_name> docker://nvcr.io/<registry>/<app:tag>

This Apptainer build command will download the app:tag NGC Docker image, convert it to Apptainer format, and save it to the local filename local_image_name. 

 Running Nvidia Images

Running Nvidia Images

Directory access:

Apptainer containers are themselves ostensibly read only. In order to provide application input and output host directories are generally bound to the container, this is accomplished through the Apptainer -B flag. The format of this flag is -B <host_src_dir>:<container_dst_dir>. Once a host directory, host_src_dir, is bound into the container you may interact with this directory from within the container, located at container_dst_dir, the same as you would outside the container.

GPU support:

All NGC containers are optimized for NVIDIA GPU acceleration so you will always want to add the --nv flag to enable NVIDIA GPU support within the container.

Standard run command:

The Apptainer command below represents the canonical form that will be used on the Ocelote cluster.

$ singularity exec --nv --pwd <work_dir> <image.simg> <cmd>   # <work_dir> should be set to either $HOME or /tmp


Containers Available on HPC

We support the use of HPC and ML/DL containers available on NVIDIA GPU Cloud (NGC). Many of the popular HPC applications including NAMD, LAMMPS and GROMACS containers are optimized for performance and available to run in Apptainer on Ocelote or Puma. The containers and respective README files can be found in /contrib/singularity/nvidia. But. They are only available from compute nodes, so start an interactive session if you want to view them.

We do not update these very often as it is time consuming and some of them change frequently.  So we encourage you to pull your own from Nvidia

  • The Nvidia images have been modified to include bindings for your /xdisk and /groups directories if you want to run your jobs there
  • The filename has a tag at the end that represents when it was made. For example, 18.01 is January 2018.
ContainerDescription
nvidia-caffe.20.01-py3.simgCaffe is a deep learning framework made with expression, speed, and modularity in mind. It was originally developed by the Berkeley Vision and Learning Center (BVLC) 
nvidia-gromacs.2018.2.simg
nvidia-julia.1.2.0.simg
nvidia-lammps.24Oct2018.sif
nvidia-namd_2.13-multinode.sif
nvidia-pytorch.20.01-py3.simg

PyTorch is a Python package that provides two high-level features:

  • Tensor computation (like numpy) with strong GPU acceleration
  • Deep Neural Networks built on a tape-based autograd system
nvidia-rapidsai.sif
nvidia-relion_2.1.b1.simg
nvidia-tensorflow_2.0.0-py3.sifTensorFlow is an open source software library for numerical computation using data flow graphs. TensorFlow was originally developed by researchers and engineers working on the Google Brain team within Google's Machine Intelligence research organization for the purposes of conducting machine learning and deep neural networks research.
nvidia-theano.18.08.simgTheano is a Python library that allows you to define, optimize, and evaluate mathematical expressions involving multi-dimensional arrays efficiently.


Sharing Your Containers

If you have containers that you would like to share with your research group or broader HPC community, you may do so in the space /contrib/singularity/shared. Note that this location is only accessible on a compute node either in an interactive session or batch script.

To do this, start an interactive session and change to /contrib/singularity/shared:

(elgato) [user@junonia ~]$ interactive -a YOUR_GROUP
Run "interactive -h for help customizing interactive use"
Submitting with /usr/local/bin/salloc --job-name=interactive --mem-per-cpu=4GB --nodes=1    --ntasks=1 --time=01:00:00 --account=YOUR_GROUP --partition=standard
salloc: Pending job allocation 308349
salloc: job 308349 queued and waiting for resources
salloc: job 308349 has been allocated resources
salloc: Granted job allocation 308349
salloc: Waiting for resource configuration
salloc: Nodes cpu1 are ready for job
[user@cpu1 ~]$ cd /contrib/singularity/shared

Next, create a directory, set the group ownership, and set the permissions. For example, if you wanted your directory to only be writable by you and be accessible to the whole HPC community, you could run (changing user and YOUR_GROUP to match your own desired directory name and HPC group, respectively):

[user@cpu1 shared]$ mkdir user
[user@cpu1 shared]$ chgrp YOUR_GROUP user/
[user@cpu1 shared]$ chmod 755 user/
[user@cpu1 shared]$ ls -ld user/
drwxr-sr-x 2 user YOUR_GROUP 0 Apr 11 14:17 user/

Next, add any images you'd like to share to your new directory, for example:

[user@cpu1 shared]$ cd user/
[user@cpu1 user]$ apptainer pull ./hello-world.sif shub://vsoch/hello-world
INFO:    Downloading shub image
59.8MiB / 59.8MiB [===============================] 100 % 4.8 MiB/s 0s
[user@cpu1 user]$ ls
hello-world.sif

As soon as your images are in this location, other HPC users can access them interactively or in a batch script. An example batch job is shown below:

singularity_example.slurm
#!/bin/bash
#SBATCH --job-name=singularity_contrib_example
#SBATCH --account=YOUR_GROUP
#SBATCH --partition=standard
#SBATCH --nodes=1
#SBATCH --ntasks=1
#SBATCH --time=00:01:00

apptainer run /contrib/singularity/shared/user/hello-world.sif

Submitting the job and checking the output:

(elgato) [user@junonia ~]$ sbatch singularity_example.slurm 
Submitted batch job 308351
(elgato) [user@junonia ~]$ cat slurm-308351.out 
RaawwWWWWWRRRR!! Avocado!


Tutorials

 Simple Interactive Example

Simple Example

The lolcow image is often used as the standard "hello world!" introduction to containers and is described in Singularity's documentation. To follow their example, first start by logging into an interactive terminal session and pull the image:

$ apptainer pull docker://godlovedc/lolcow
INFO:    Converting OCI blobs to SIF format
INFO:    Starting build...
Getting image source signatures
[...]
Writing manifest to image destination
Storing signatures
INFO:    Creating SIF file...

This will pull the image from Docker Hub and save it in your home in a hidden directory .singularity. Next, run the image simply using singularity run

$ apptainer run lolcow_latest.sif
 ______________________________________
/ Perilous to all of us are the devices \
| of an art deeper than we ourselves    |
| possess.                              |
|                                       |
| -- Gandalf the Grey [J.R.R. Tolkien,  |
\ "Lord of the Rings"]                  /
 ---------------------------------------
        \   ^__^
         \  (oo)\_______
            (__)\       )\/\
                ||----w |
                ||     ||
 Batch Example

Running Apptainer in a Batch Job

Running a job with Apptainer is as easy as running other jobs, simply include your resource requests, and include any commands necessary to execute your workflow. For more detailed information on creating and running jobs, see our SLURM documentation or Puma Quick Start. An example script might look like:

#!/bin/bash
#SBATCH --job-name apptainer-job
#SBATCH --account=your_pi
#SBATCH --partition=standard
#SBATCH --nodes=1
#SBATCH --ntasks=1
#SBATCH --time=01:00:00

date
apptainer exec --nv dockerTF.img python TFlow_example.py
date


Example Recipe Files


 Ubuntu with Tensorflow 2.0

CentOS with Tensorflow

tensorflow-2.0.recipe
Bootstrap: docker
FROM:  nvidia/cuda:10.0-cudnn7-devel-ubuntu18.04 

%post
  . /environment
  SHELL=/bin/bash
  CPATH="/usr/local/cuda/include:$CPATH"
  PATH="/usr/local/cuda/bin:$PATH"
  LD_LIBRARY_PATH="/usr/local/cuda/lib64:$LD_LIBRARY_PATH"
  CUDA_HOME="/usr/local/cuda"
  apt-get update
  apt-get install -y wget git vim build-essential cmake libgtk2.0-0 python3.6 python3.6-dev python3.6-venv python3-distutils python3-apt libgtk-3-dev xauth curl
  wget https://bootstrap.pypa.io/pip/3.6/get-pip.py
  python3.6 get-pip.py
  ln -s /usr/bin/python3.6 /usr/local/bin/python3
  pip install tensorflow-gpu==2.0.0
  pip install astropy 

%environment
  # use bash as default shell
  SHELL=/bin/bash
  # add CUDA paths
  CPATH="/usr/local/cuda/include:$CPATH"
  PATH="/usr/local/cuda/bin:$PATH"
  LD_LIBRARY_PATH="/usr/local/cuda/lib64:$LD_LIBRARY_PATH"
  CUDA_HOME="/usr/local/cuda"
  export PATH LD_LIBRARY_PATH CPATH CUDA_HOME

To build and test a container from the recipe from an interactive session on a GPU node:

Building from recipe
[netid@cpu37 ~]$ vi tensorflow-2.0.recipe
[netid@cpu37 ~]$ apptainer build tensorflow-2.0.sif tensorflow-2.0.recipe 
INFO:    User not listed in /etc/subuid, trying root-mapped namespace
INFO:    The %post section will be run under fakeroot
INFO:    Starting build...
. . .
INFO:    Adding environment to container
INFO:    Creating SIF file...
INFO:    Build complete: tensorflow-2.0.sif

As a TensorFlow example, you could use the following script:

TFlow_example.py
#Linear Regression Example with TensorFlow v2 library 
 
from __future__ import absolute_import, division, print_function
#
import tensorflow as tf
import numpy as np
rng = np.random
#
# Parameters.
learning_rate = 0.01
training_steps = 1000
display_step = 50
#
# Training Data.
X = np.array([3.3,4.4,5.5,6.71,6.93,4.168,9.779,6.182,7.59,2.167,
              7.042,10.791,5.313,7.997,5.654,9.27,3.1])
Y = np.array([1.7,2.76,2.09,3.19,1.694,1.573,3.366,2.596,2.53,1.221,
              2.827,3.465,1.65,2.904,2.42,2.94,1.3])
n_samples = X.shape[0]
#
# Weight and Bias, initialized randomly.
W = tf.Variable(rng.randn(), name="weight")
b = tf.Variable(rng.randn(), name="bias")
 
# Linear regression (Wx + b).
def linear_regression(x):
    return W * x + b
 
# Mean square error.
def mean_square(y_pred, y_true):
    return tf.reduce_sum(tf.pow(y_pred-y_true, 2)) / (2 * n_samples)
 
# Stochastic Gradient Descent Optimizer.
optimizer = tf.optimizers.SGD(learning_rate)
#
# Optimization process. 
def run_optimization():
# Wrap computation inside a GradientTape for automatic differentiation.
    with tf.GradientTape() as g:
        pred = linear_regression(X)
        loss = mean_square(pred, Y)
 
    # Compute gradients.
    gradients = g.gradient(loss, [W, b])    
 
    # Update W and b following gradients.
    optimizer.apply_gradients(zip(gradients, [W, b]))
#
# Run training for the given number of steps.
for step in range(1, training_steps + 1):
    # Run the optimization to update W and b values.
    run_optimization()    
 
    if step % display_step == 0:
        pred = linear_regression(X)
        loss = mean_square(pred, Y)
        print("step: %i, loss: %f, W: %f, b: %f" % (step, loss, W.numpy(), b.numpy()))

The output might resemble the following:

Executing Tensorflow Example
[netid@i16n2 ~]$ apptainer exec --nv tensorflow-2.0.sif python3 TFlow_example.py 
INFO:    underlay of /etc/localtime required more than 50 (104) bind mounts
INFO:    underlay of /usr/bin/nvidia-smi required more than 50 (540) bind mounts
2022-10-27 13:14:25.049501: I tensorflow/stream_executor/platform/default/dso_loader.cc:44] Successfully opened dynamic library libcuda.so.1
2022-10-27 13:14:25.069796: I tensorflow/core/common_runtime/gpu/gpu_device.cc:1618] Found device 0 with properties: 
name: Tesla P100-PCIE-16GB major: 6 minor: 0 memoryClockRate(GHz): 1.3285
pciBusID: 0000:0b:00.0
2022-10-27 13:14:25.076227: I tensorflow/stream_executor/platform/default/dso_loader.cc:44] Successfully opened dynamic library libcudart.so.10.0
2022-10-27 13:14:25.130541: I tensorflow/stream_executor/platform/default/dso_loader.cc:44] Successfully opened dynamic library libcublas.so.10.0
2022-10-27 13:14:25.152105: I tensorflow/stream_executor/platform/default/dso_loader.cc:44] Successfully opened dynamic library libcufft.so.10.0
2022-10-27 13:14:25.170536: I tensorflow/stream_executor/platform/default/dso_loader.cc:44] Successfully opened dynamic library libcurand.so.10.0
2022-10-27 13:14:25.221289: I tensorflow/stream_executor/platform/default/dso_loader.cc:44] Successfully opened dynamic library libcusolver.so.10.0
2022-10-27 13:14:25.254668: I tensorflow/stream_executor/platform/default/dso_loader.cc:44] Successfully opened dynamic library libcusparse.so.10.0
2022-10-27 13:14:25.335204: I tensorflow/stream_executor/platform/default/dso_loader.cc:44] Successfully opened dynamic library libcudnn.so.7
2022-10-27 13:14:25.335836: I tensorflow/core/common_runtime/gpu/gpu_device.cc:1746] Adding visible gpu devices: 0
2022-10-27 13:14:25.337681: I tensorflow/core/platform/cpu_feature_guard.cc:142] Your CPU supports instructions that this TensorFlow binary was not compiled to use: AVX2 FMA
2022-10-27 13:14:25.371777: I tensorflow/core/platform/profile_utils/cpu_utils.cc:94] CPU Frequency: 2399925000 Hz
2022-10-27 13:14:25.373812: I tensorflow/compiler/xla/service/service.cc:168] XLA service 0x3e6c350 executing computations on platform Host. Devices:
2022-10-27 13:14:25.373928: I tensorflow/compiler/xla/service/service.cc:175]   StreamExecutor device (0): Host, Default Version
2022-10-27 13:14:25.511775: I tensorflow/compiler/xla/service/service.cc:168] XLA service 0x3b4aaf0 executing computations on platform CUDA. Devices:
2022-10-27 13:14:25.511949: I tensorflow/compiler/xla/service/service.cc:175]   StreamExecutor device (0): Tesla P100-PCIE-16GB, Compute Capability 6.0
2022-10-27 13:14:25.512236: I tensorflow/core/common_runtime/gpu/gpu_device.cc:1618] Found device 0 with properties: 
name: Tesla P100-PCIE-16GB major: 6 minor: 0 memoryClockRate(GHz): 1.3285
pciBusID: 0000:0b:00.0
2022-10-27 13:14:25.512614: I tensorflow/stream_executor/platform/default/dso_loader.cc:44] Successfully opened dynamic library libcudart.so.10.0
2022-10-27 13:14:25.512730: I tensorflow/stream_executor/platform/default/dso_loader.cc:44] Successfully opened dynamic library libcublas.so.10.0
2022-10-27 13:14:25.512756: I tensorflow/stream_executor/platform/default/dso_loader.cc:44] Successfully opened dynamic library libcufft.so.10.0
2022-10-27 13:14:25.512772: I tensorflow/stream_executor/platform/default/dso_loader.cc:44] Successfully opened dynamic library libcurand.so.10.0
2022-10-27 13:14:25.512884: I tensorflow/stream_executor/platform/default/dso_loader.cc:44] Successfully opened dynamic library libcusolver.so.10.0
2022-10-27 13:14:25.512909: I tensorflow/stream_executor/platform/default/dso_loader.cc:44] Successfully opened dynamic library libcusparse.so.10.0
2022-10-27 13:14:25.512926: I tensorflow/stream_executor/platform/default/dso_loader.cc:44] Successfully opened dynamic library libcudnn.so.7
2022-10-27 13:14:25.513202: I tensorflow/core/common_runtime/gpu/gpu_device.cc:1746] Adding visible gpu devices: 0
2022-10-27 13:14:25.514805: I tensorflow/stream_executor/platform/default/dso_loader.cc:44] Successfully opened dynamic library libcudart.so.10.0
2022-10-27 13:14:25.515918: I tensorflow/core/common_runtime/gpu/gpu_device.cc:1159] Device interconnect StreamExecutor with strength 1 edge matrix:
2022-10-27 13:14:25.516108: I tensorflow/core/common_runtime/gpu/gpu_device.cc:1165]      0 
2022-10-27 13:14:25.516290: I tensorflow/core/common_runtime/gpu/gpu_device.cc:1178] 0:   N 
2022-10-27 13:14:25.517711: I tensorflow/core/common_runtime/gpu/gpu_device.cc:1304] Created TensorFlow device (/job:localhost/replica:0/task:0/device:GPU:0 with 15223 MB memory) -> physical GPU (device: 0, name: Tesla P100-PCIE-16GB, pci bus id: 0000:0b:00.0, compute capability: 6.0)
step: 50, loss: 0.364507, W: 0.555666, b: -1.356643
step: 100, loss: 0.331617, W: 0.537752, b: -1.229641
step: 150, loss: 0.302488, W: 0.520894, b: -1.110123
step: 200, loss: 0.276691, W: 0.505029, b: -0.997647
step: 250, loss: 0.253844, W: 0.490099, b: -0.891799
step: 300, loss: 0.233610, W: 0.476048, b: -0.792186
step: 350, loss: 0.215690, W: 0.462825, b: -0.698444
step: 400, loss: 0.199820, W: 0.450382, b: -0.610224
step: 450, loss: 0.185765, W: 0.438671, b: -0.527203
step: 500, loss: 0.173317, W: 0.427651, b: -0.449073
step: 550, loss: 0.162293, W: 0.417280, b: -0.375547
step: 600, loss: 0.152530, W: 0.407520, b: -0.306353
step: 650, loss: 0.143884, W: 0.398335, b: -0.241236
step: 700, loss: 0.136226, W: 0.389691, b: -0.179956
step: 750, loss: 0.129444, W: 0.381557, b: -0.122287
step: 800, loss: 0.123438, W: 0.373902, b: -0.068015
step: 850, loss: 0.118119, W: 0.366698, b: -0.016941
step: 900, loss: 0.113408, W: 0.359918, b: 0.031123
step: 950, loss: 0.109236, W: 0.353538, b: 0.076356
step: 1000, loss: 0.105541, W: 0.347534, b: 0.118923
[netid@i16n2 ~]$
 MPI

MPI

Apptainer supports MPI pretty well since, by default, the network is the same inside and outside the container. The more complicated bit is making sure that the container has the right set of MPI libraries. MPI is an open specification, but there are several different implementations (OpenMPI, MVAPICH2, and Intel MPI to name three) with some non-overlapping feature sets. If the host and container are running different MPI implementations, or even different versions of the same implementation, hilarity may ensue. 

The general rule is that you want the version MPI inside the container to be the same version or newer than the host. You may be thinking that this is not good for the portability of your container and you are right. Containerizing MPI applications is not terribly difficult with Singularity, but it comes at the cost of additional requirements for the host system. 

In this example, the infiniband pieces are installed and then the MVAPICH version of MPI. When the job is run, the script will need to load the correct module with the matching version of MVAPICH.

MPI Recipe File
BootStrap: debootstrap
OSVersion: xenial
MirrorURL: http://us.archive.ubuntu.com/ubuntu/


%runscript
    echo "This is what happens when you run the container..."


%post
    echo "Hello from inside the container"
    sed -i 's/$/ universe/' /etc/apt/sources.list
    apt update
    apt -y --allow-unauthenticated install vim build-essential wget gfortran bison libibverbs-dev libibmad-dev libibumad-dev librdmacm-dev libmlx5-dev libmlx4-dev
    wget http://mvapich.cse.ohio-state.edu/download/mvapich/mv2/mvapich2-2.1.tar.gz
    tar xvf mvapich2-2.1.tar.gz
    cd mvapich2-2.1
    ./configure --prefix=/usr/local
    make -j4
    make install
    /usr/local/bin/mpicc examples/hellow.c -o /usr/bin/hellow


Cache Directory

To speed up image downloads for faster, less redundant builds and pulls,  Apptainer sets a cache directory in your home under ~/.apptainer. This directory stores images, metadata, and docker layers that can wind up being reasonably large. If you're struggling with space usage and your home's 50GB quota, one option is to set a new Apptainer cache directory. You can do this by setting the environment variable APPTAINER_CACHEDIR to a new directory. From Apptainer's documentation:

If you change the value of APPTAINER_CACHEDIR be sure to choose a location that is:

  1. Unique to you. Permissions are set on the cache so that private images cached for one user are not exposed to another. This means that APPTAINER_CACHEDIR cannot be shared.

  2. Located on a filesystem with sufficient space for the number and size of container images anticipated.

  3. Located on a filesystem that supports atomic rename, if possible.

For example, if you wanted to set your cache directory to your PI's /groups directory under a directory you own, you could use:

export APPTAINER_CACHEDIR=/groups/pi/netid/.apptainer

Assuming pi is your PI's NetID and netid is your own NetID. To make the change permanent, add this line to the hidden file in your home directory ~/.bashrc